
We’ve all been there—you’re cleaning out your closet, and you find a pile of T-shirts you love, but they just don’t fit quite right anymore. Sound familiar? If you’re like me, you’ve probably thought about getting them tailored, but let’s be honest—who has the time? Instead of letting them collect dust, why not grab a pair of scissors and give them a makeover? It’s easier than you think, and you might end up with some seriously cute new pieces while flexing your DIY skills!
I started off experimenting on thrifted shirts, but now I’m feeling bold enough to tackle some of my actual favorites. And guess what? These revamped tees look so good they’ve become my go-to for casual outfits. Whether you pair them with denim shorts or cargo pants, a cut-up tee adds that effortless, cool-girl vibe. Ready to get started? Let’s go over the essentials and dive into five fun styles you can try!
What You’ll Need
- Sharp scissors: Hair-cutting or fabric scissors work best for clean, precise cuts.
- Pen or washable chalk: Useful for marking lines on your shirt to guide your cutting. If you’re confident, you can eyeball it!
Now, let’s dive into these DIY cutting styles to revamp your T-shirt collection!
The Cropped Cut

An easy and classic way to breathe new life into a T-shirt that’s too long. Customize the crop to any length you desire!
Steps:
- Lay the shirt flat and smooth out any wrinkles.
- Decide where you want the new hemline. (Trying the shirt on beforehand helps.)
- Use a measuring tape to mark even points on each side of the shirt.
- Cut along the marked line from one side to the other.
- Stretch the hemline with your fingers to give it a more worn-in look.
Optional: If the sleeves feel bulky, trim off the ends for a sleeker silhouette.
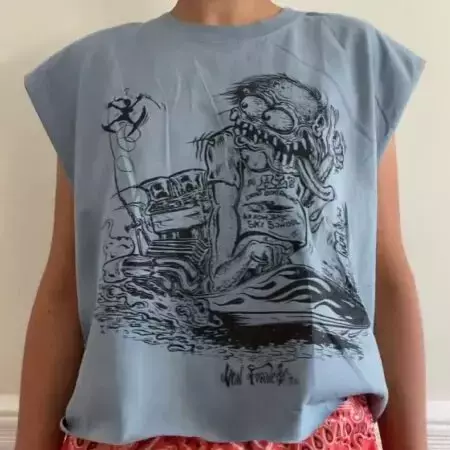
The Overall Distressed Cut with Cap Sleeves
This look has a bit of everything—distressed cuts and cap sleeves. It’s a more advanced style but leaves room for creativity.
Steps:
- Lay the shirt flat on your workspace.
- Starting at the armpit of one sleeve, cut a diagonal line to the right, through both layers of fabric.
- Once the piece is removed, use it as a guide to create a symmetrical cut on the other sleeve.
- For the distressed look, make small cuts wherever you want them, then stretch the fabric to widen the slits.
Optional: Crop the shirt to your desired length following the previous steps.
The One-Shoulder Cut
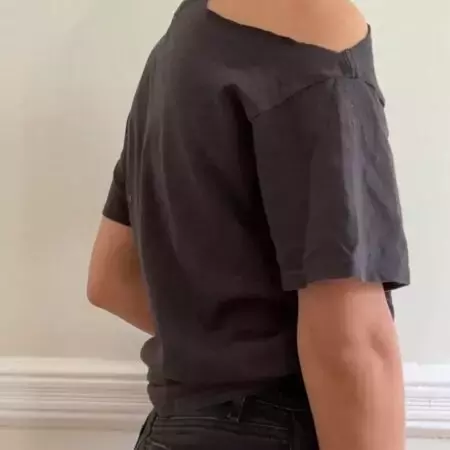
Give your shirt an edgy twist with an asymmetrical one-shoulder cut. For a balanced look, repeat the process on the other side to create a cold-shoulder style.
Steps:
- Turn the shirt inside out, front side facing up.
- On one side, make a vertical cut parallel to the collar, going through both layers of fabric.
- Continue around the collar for about two inches, then cut diagonally to the sleeve corner, forming a triangle.
- Flip the shirt over and trim the uncut piece near the collar to complete the look.
- Stretch the edges to soften the cut for a worn-in effect.
Optional: Repeat on the other side for a cold-shoulder style.
The V-Neck Cut
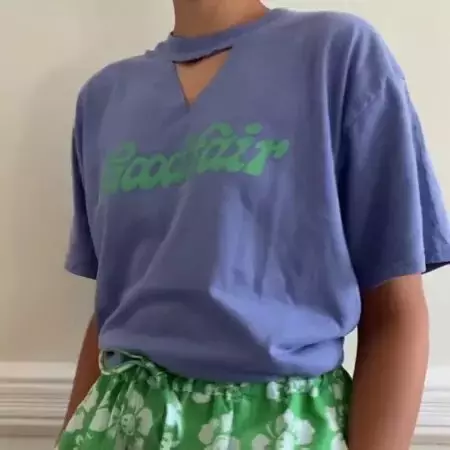
This updated take on the classic V-neck is how all the cool kids are wearing it. For this style, you’ll keep the collar trim intact and make your cuts just below, creating a choker-like effect. You can adjust the width and depth based on your preference.
Steps:
- Turn the shirt inside out and lay it flat with the front facing up.
- Mark the middle of the collar with a pen or chalk. Make a horizontal cut right below the collar.
- Continue cutting until you reach the desired width, then make a vertical cut downward.
- Cut diagonally from each end of the horizontal line to the bottom of the vertical cut, forming a triangle under the collar.
- Flip the shirt back to see how it fits. Adjust the size of the cutout as needed, then stretch the sides for a more relaxed look.
The Sleeveless Cut
This cut is similar to the cropped style but removes the sleeves for a tank-top vibe. Wear a cute bralette underneath if the armholes dip a bit low.
Steps:
- Lay the shirt flat and decide where you want the new hemline. Cut straight across the shirt.
- Cut horizontally along the sleeve’s seam, stopping at the shoulder.
- Continue cutting downward along the seam until the sleeve is fully removed.
- Repeat on the other side.
- Stretch out the armholes and hem to smooth the edges.
FAQs
Q: Do I need special scissors for cutting T-shirts?
A: Yes, using sharp scissors like fabric or hair-cutting scissors will ensure clean cuts and prevent fraying. Dull scissors may cause jagged edges and make it harder to achieve precise lines.
Q: How do I keep my cut T-shirt from unraveling?
A: Stretch the fabric slightly after cutting to encourage the edges to curl inward, which helps prevent fraying. You can also sew or use fabric glue to reinforce the edges if you prefer a more polished look.
Q: Can I still cut T-shirts that have prints or graphics on them?
A: Absolutely! Just be mindful of where the design is placed before cutting. Try to cut around the graphic to maintain its visibility and style the shirt to highlight the print.